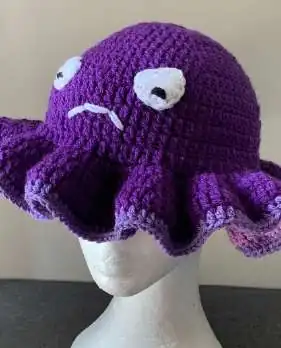
Crochet is a wonderful way to express your creativity, and what could be more fun than making a quirky, eye-catching octopus bucket hat? In this post, We will dive deep into the world of crochet with an exclusive focus on the octopus bucket hat. Whether you’re a seasoned crocheter or just starting, this article breaks down everything you need to know to create your own fun and unique hat.
Imagine combining the playful nature of an octopus with the practical style of a bucket hat. This project is a perfect way to showcase your crochet skills. With the rising popularity of DIY fashion and handmade accessories, free crochet octopus hat patterns like this one are ideal for those who make a unique and stylish bucket hat while keeping low costs.
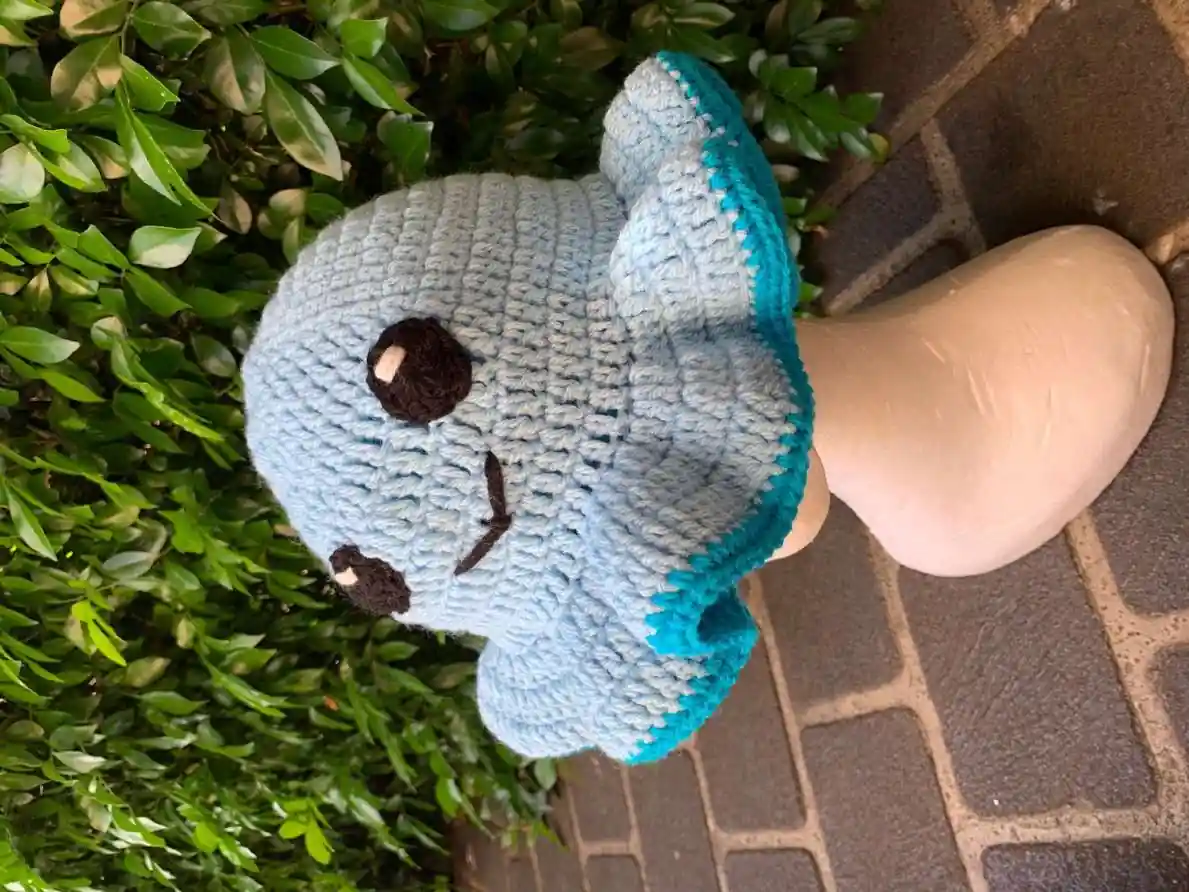
Free Reversible Octopus Bucket Hat Crochet Pattern
Skills
You will need a basic understanding of crochet and intermediate embroidery skills
This is a minimal sewing project – all construction of the reversible hat is NO SEW and you can leave all your ends inside the two hats… only sewing is face embroidery
8 ply/worsted weight yarn – I use (Australian) Marvel 8ply acrylic in these images
You will want 2 contrasting colours for the hats as well as a 3rd matching colour for the brim edge
Black and white yarn for face details
4mm crochet hook
Darning needle
Notes:
Hat is worked from the top down working in separate rows
Each row starts with ch2 which counts as your first stitch. Eg. (inc, 2dc) = chain 2, dc into the same space, 1dc into the next 2 spaces
This is an adult sized hat – smaller sizes can be achieved by eliminating increase rows between row 6-8
This pattern is in US crochet terms
Use medium to tight tension
Abbreviations
dc – double crochet
hdc – half double crochet
sl st – slip stitch
ch – chain
mc – magic circle
inc – increase (2 dc into the same stitch)
(26)– number of stitches in the row
(inc, dc x 4) x Z – repeat pattern in brackets Z times
Flo – front loop only (work into the front loop of the stitch
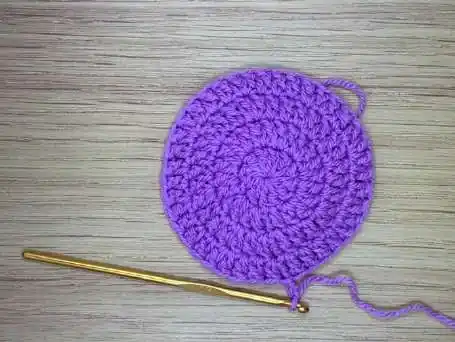
Hat Base:
– Make x2 in contrasting colours – Sl st into end of each row – Each row starts with ch2 which counts as your first dc stitch
Pattern:
1. Mc dc 12 (12) 2. 2 dc into each st (24) 3. (2 dc into first stitch, 2 dc) x 8 (32) 4. (2 dc into first st, 3 dc) x 8 (40)
5. (2 dc into first st, 4 dc) x 8 (48) 6. (2 dc into first st, 5 dc) x 8 (56) 7. (2 dc into first st, 6 dc) x 8 (64) 8. (2 dc into first st, 7 dc) x 8 (72) 9. dc around (72) Rows 10 -13 dc around (72)
15. (2 dc in first st, 1 dc) x 72 (216) 16. (2 dc in first st, 7 dc) x 27 (243) 17. sew in tail
Face Details
Make sure to do this before joining the two hat bases together –
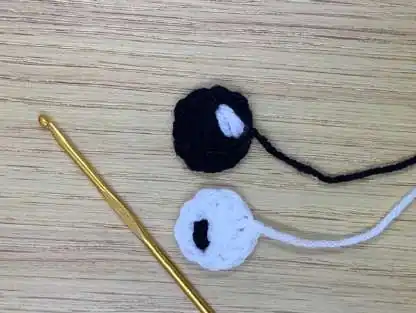
Eyes
mc(dc) x 12 leaving a long tail for stitching on contrast colour embroider pupil – double strand stitch twice Stitch on eyes and embroider mouth – see images for placement
Happy face = eye pupils pointing up and smiley mouth Grumpy face = eye pupils facing down and frowny mouth
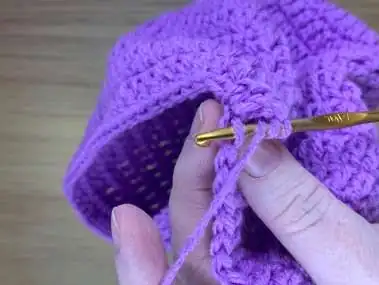
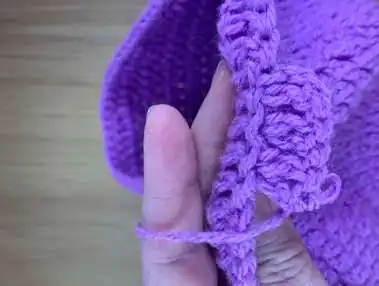
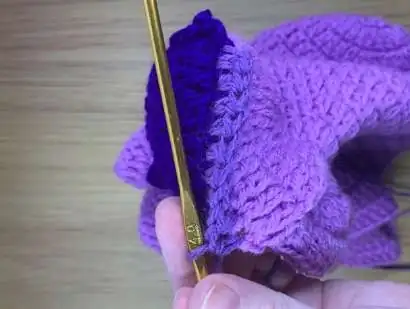
Joining hats to make reversible
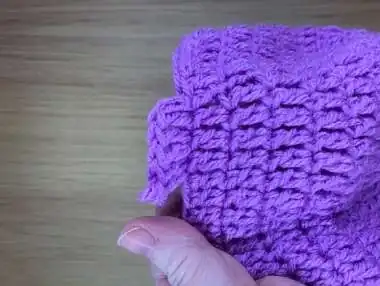
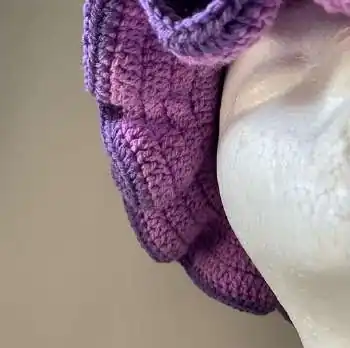
Tie the tails from the crown of each hat together with a triple knot, insides touching. Place stitch marker to join the brims of each hat making sure face details are in line. Using your third chosen colour HDC both brim edges together working through both stitches on each hat base (see photos) HDC in each st all the way around, sl st into first hdc and sew in tail
Shape the completed hat by shoving that beauty on your head and making sure everything is in line!
Final Thoughts:
Creating an octopus bucket hat using a free crochet pattern is not only a rewarding project but also a unique way to express your personal style. With clear instructions, a list of basic materials, and plenty of creative freedom, this guide is designed to help you achieve fantastic results – no matter your skill level.


")
")
")
")
")
")
")
")
")
")
